
Help & Support
SHOULD YOU NEED ANY ASSISTANCE?
Kindly contact us


Install SSL in Windows Server 2012 IIS 8
Step 1: Install the SSL Certificate
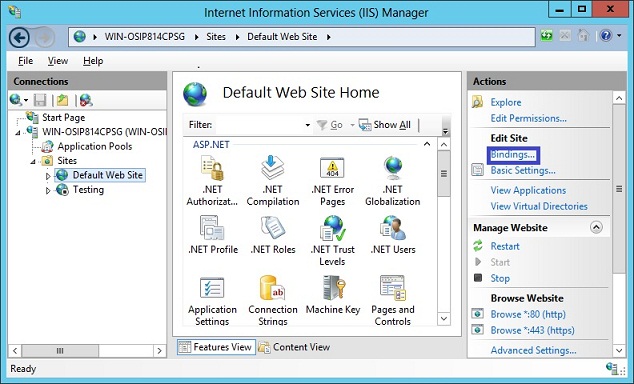
- Go to Start > Administrative Tools > Internet Information Services (IIS) Manager
- From the left menu, click the corresponding server name
- In the Features pane (middle pane), under Security, double-click Server Certificates
- From the Actions pane (right pane), select Complete Certificate Request
- Provide the location of the certificate file and a friendly name
- Be sure that the Personal store is selected, then click OK
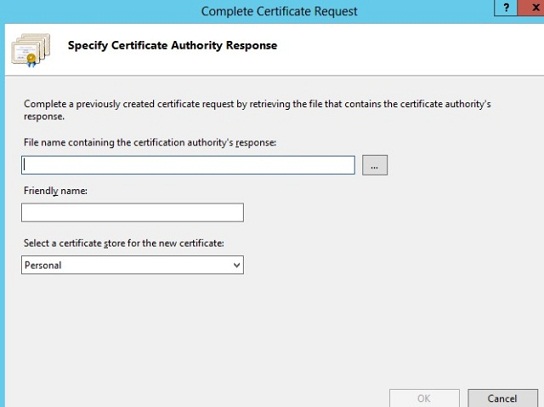
Note: The Friendly Name is a reference name for quick identification of the certificate for the Administrator
Step 2: Bind SSL certificate to the web site
- From the Connections column on the left, expand the Sites folder
- Select the appropriate web site.
- From the Actions pane on the right, click on Bindings
- In the Site Bindings window, If there is no existing https binding, choose Add and change type from HTTP to HTTPS
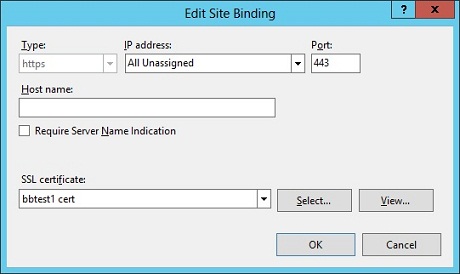
- From the SSL Certificate drop down, select the friendly name for the SSL certificate that was used during installation
- Click OK
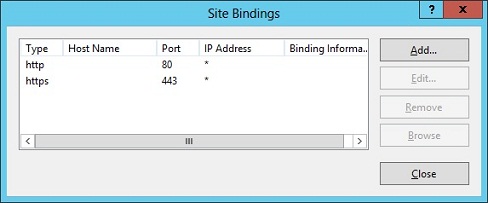
Note: If there is an https binding, select it and click Edit
Step 3: Verify certificate installation
- To verify the SSL certificate installation, use the Installation Checker
- In some rare cases, a restart of IIS or a reboot of the server may be necessary in order for the changes to take affect.